
Laboratory Cabinet Installation Guide
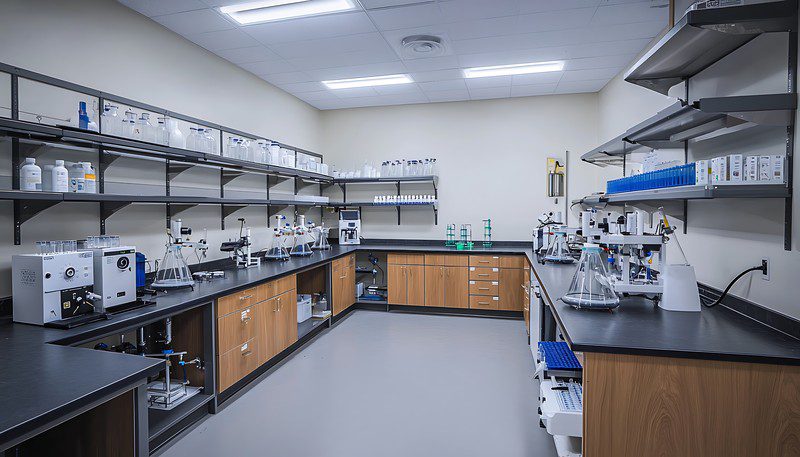
Quick Summary
Laboratory cabinet installation runs in a set sequence: confirm the floor plan and utility rough-ins, prepare the site before delivery, set and level base cabinets, then fit work surfaces, uppers, and service connections. Getting the order wrong creates alignment problems that are expensive to correct later.
A successful lab cabinet installation depends on far more than simply setting furniture in place along a wall. Laboratory cabinetry needs to align precisely with plumbing, electrical, and ventilation systems while supporting the specific workflow of the people who will use the space every day.
We have guided countless laboratories through this process, and we want to walk you through what a well-planned cabinet installation actually involves from start to finish.
Step One: Plan Around Your Lab’s Layout and Workflow
Before any cabinet arrives on site, the planning phase determines how well the finished installation will actually serve your laboratory. This means mapping out where sinks, fume hoods, and major equipment will sit, then designing the surrounding lab cabinet placement to support an efficient workflow between these stations.
Considering how staff will move through the space, where hazardous materials will be stored, and how much clearance is needed around doors and walkways all factor into a layout that feels functional rather than cramped once everything is in place.
Step Two: Confirm Utility and Structural Requirements
Laboratory cabinets often need to accommodate plumbing for sinks, electrical outlets for equipment, and sometimes gas lines for specific applications. Confirming the exact location of these utilities before installation begins prevents costly adjustments later.
It is also worth verifying that the floor can support the weight of fully loaded cabinetry, particularly for stainless steel cabinets and casework, which tend to be heavier than standard laminate options and may require additional structural consideration in certain building types.
Step Three: Prepare the Site Before Delivery
A smooth installation depends on a properly prepared site. This includes ensuring the space is clean, clear of debris, and that walls or floors are level enough to support the cabinetry without excessive shimming.
If any demolition or removal of old furniture is required, completing this work before the new cabinets arrive keeps the installation timeline on track and reduces the chances of damage to new units during the process.
Step Four: Receive and Inspect Your Cabinet Delivery
Once your cabinets arrive, inspecting each piece for shipping damage before installation begins is an important quality control step. Checking that the delivered items match your original order, including finishes, dimensions, and any custom features, helps catch discrepancies early rather than after installation is already underway.
Step Five: Position and Secure the Cabinets
Installation begins with base cabinets, which are leveled carefully against the floor before being secured to the wall or to one another for stability, a sequence reflected in the installation practices SEFA publishes for laboratory furniture. Countertops are then set in place, followed by upper cabinets and any specialty components like fume hood enclosures.
Every connection point is checked for proper alignment, since even small gaps or unevenness can affect both the appearance and the long-term durability of the installation.
Step Six: Connect Utilities and Test Functionality
With cabinetry secured, any plumbing, electrical, or gas connections integrated into the casework are completed and tested. This step confirms that sinks drain properly, outlets function safely, and any specialized fittings work as intended before the lab is put into daily use.
Testing at this stage, rather than after the space is already occupied, allows any issues to be resolved without disrupting ongoing lab operations.
Step Seven: Final Walkthrough and Quality Check
A thorough final walkthrough should confirm that every cabinet is secure, doors and drawers open and close smoothly, and all surfaces are free of damage from the installation process.
This is also the right time to verify that the layout matches what was originally planned and that any customizations, from adjustable shelving to specialized storage for chemicals, function as expected.
How LOC Scientific Supports Your Installation
LOC Scientific designs, sells, and installs laboratory furniture, fume hoods, and accessories, and our team brings hands-on experience to every project we take on. Our cabinetry is made in the USA, so we maintain close oversight of quality throughout the manufacturing process, and our installation teams understand exactly how our products are built and how they should be integrated into your specific space.
Whether you need standard cabinetry or a fully customized layout, LOC Scientific works with you from initial planning through final walkthrough so your laboratory is set up for long-term success. Contact LOC Scientific today to discuss your project and get a customized plan for your space.
FAQs
Installation timelines vary based on the size of the lab and complexity of the layout, but most standard installations are completed within a few days to a couple of weeks, including utility connections and final inspection.
This depends on your supplier. Some laboratory furniture companies, including LOC Scientific, coordinate these connections directly or work closely with licensed contractors to streamline the process for you.
In many cases, yes, though this requires careful measurement and planning in advance to ensure the new cabinetry fits properly around fixed equipment without compromising accessibility or workflow.